Jiffy introduction 🥁

For our second week project, we’ll be building an app called Jiffy. It uses the Giphy API to search for gifs and shows them in a big stack on the page.

jiffy

With this project we will learn:

  • Learning about APIs and why they’re awesome
  • Running key events in React
  • How to fetch data using AJAX in React
  • Using state to control our app and data
  • How to tell users when we have errors
  • Using CSS grid tricks to stack our elements

At the end of this week we’ll also get to grips with git and how we can deploy our React apps live onto the web.

Building modern React apps

Traditionally when building websites, we include our Javascript files on the page and then write our code into them. Each one knows about the others and we can just get on with coding.

<!-- we include our files -->
<script src="jquery.js"></script>
<script src="jquery-carousel.js"></script>
<!-- and then write our own code on top -->
<script src="main.js"></script>

Modern Javascript applications work a bit differently to that. We need to use a special tool that bundles together all of our files because React’s JSX code is not regular Javascript.

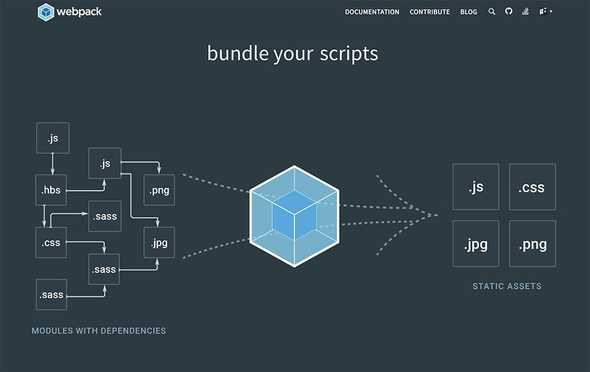
webpack

The most popular tool to do this bundling together is called webpack. It takes all kinds of files like Javascript files, CSS files, images and creates a bundled application for us at the end. The trouble with webpack is that it’s a real pain to understand and configure, leading to lots of frustration and wasted time.

Introducing create-react-app

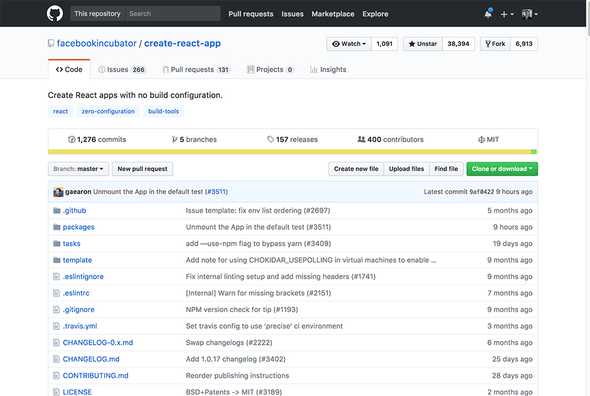
create-react-app is a tool developed by Facebook to allow developers to build React apps easily. It uses webpack under the surface but hides all of the configuration to make life easier for developers so they can focus on building great apps.

create react app

We’ll be using create-react-app to develop this project. It does lots of very useful things for us like:

  • Automatically running the website as a server
  • Auto-reloading our page every time we save code
  • Supporting the latest Javascript syntax and CSS
  • Ability to build our project at the end into a production version

Let’s see how we can get ourselves set up with it.

Installing node, npm and yarn

Node lets us use Javascript on backend servers, and we can also use it on our own computers too. create-react-app — along with most other build tools — requires node to run. It’s completely free to install and use.

npm (node package manager) is a tool built into node that downloads and installs packages and libraries for us. They’re all stored online in what’s called the npm registry, a bit like a public database of all the packages and libraries.

Install node

1. Install node using homebrew

Homebrew is a tool that helps us install programs on our computer. It only works on macOS currently but is really excellent as stuff just works.

Install homebrew by running this in the terminal:

/usr/bin/ruby -e "$(curl -fsSL https://raw.githubusercontent.com/Homebrew/install/master/install)"

With homebrew installed we will need to run:

brew install node

2. Install node using the installer

One way to install node is using the installer from the website, which works on both macOS and Windows.

Install yarn

Yarn is a package manager like npm, used by create-react-app, we can install it via homebrew too:

brew install yarn

Or alternatively, download and install it from the website.

Getting create-react-app installed

With node installed, we now have the ability to run node and also install npm packages from our terminal.

To install create-react-app, we need to run this from our terminal:

npm install -g create-react-app

Usually, when we install packages it installs them to the folder we’re in, but with -g we install it globally, meaning we can run it from anywhere.

Creating and running our app

Now we’ve got create-react-app installed, we can create our app with it:

# create the app
create-react-app jiffy
# change into the folder
cd jiffy/
# run the app
npm start

If it all creates and runs successfully you should see something like:

Compiled successfully!

You can now view jiffy in the browser.

  Local:            http://localhost:3000/
  On Your Network:  http://192.168.1.210:3000/

Note that the development build is not optimized.
To create a production build, use yarn build.

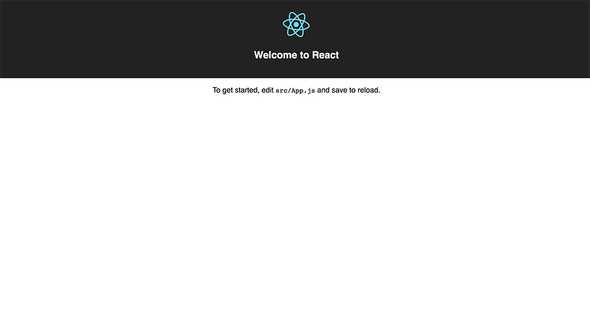
Your browser should also automatically open to something that looks like this:

create react app

Our React app structure

When we create our app, it gives us a fairly simple boilerplate structure to start off with. This is great for this project as we only want to keep things to a few component files, so this is a perfect starting point.

The difference between our previous week’s structure and this weeks is that things like react and react-dom are now coming via our npm_modules folder, and are imported into our files using Javascript’s module system. This is something we’ll introduce in the next section.

public/
# where the react app mounts
→ index.html
→ favicon.ico
# used by mobile browsers to create a homepage app
→ manifest.json
src/
# specific css for the app.js file, we’ll remove it later
→ App.css
# the main app component file
→ App.js
# tests for App.js (we won’t be worrying about these and will remove it later)
→ App.test.js
# our main css file, we’ll only use this one file for the project
→ index.css
# our main javascript file that ties everything together
→ index.js
# the react logo asset
→ logo.svg
# service worker is for offline support
→ registerServiceWorker.js
# this is where react, react-dom and all that good stuff is stored
node_modules/
# used by git to stop all the npm packages going into git
.gitignore
# a list of our app packages that it uses
package.json
# file readme
README.md
# a list of all the packages strictly listed with versions
yarn.lock

Javascript in React continued

This week we’re going to introduce a couple more modern Javascript language features:

  • class
  • async/await
  • fetch

Classes and class components

Although we’ve already looked at how to make a class component, we never really explored what a class is.

A class is a bit like a template for creating things in programming languages. In the case of our React component class, it’s a template that comes with some ready-built helpers like render, componentDidMount and componentWillReceiveProps. When we make a Search component we say:

class Search extends React.Component

The extends bit is key here, we’re taking React’s default template and then extending it with our own code and methods to do what we want.

Every time we use a class it creates a new instance of it, and that instance keeps hold of all its own state and methods.

We mostly use function components in React, but when we want more advanced functionality like the lifecycle methods, we use a class to achieve that.

Async/await

When doing things like fetching data in the background, say from another server, this is what’s called an asynchronous operation… it happens whilst other stuff is still going on.

To make our code more readable when fetching data we can use async/await, it’s a way we can write functions that wait for things like data to be sent back before continuing.

If we wanted to write an asynchronous (async for short) function, it looks like this:

// we put the word `async` before the function
async function getUsers(url) {
  // we use a special `await` keyword
  // tells the code to wait here until we get something back
  const resp = await fetch(url)
  // we’ll show what fetch actually is in the next section
  // here we `await` again to convert our data to json
  const data = await resp.json()
  // return the data back from the function
  return data
}
// run the function like this
getUsers('https://api.superhi.com/users')

Now, what happens when something goes wrong? How do we handle that?

We can use something called try/catch inside of our function. Firstly it will try to fetch the data, and if it fails it will jump down to the catch section to handle the error and tell the user something’s gone wrong.

async function getUsers(url) {
  // first try the code we want
  try {
    const resp = await fetch(url)
    const data = await resp.json()
    return data
    // if the try fails we catch the error here
  } catch (error) {
    // now we can handle the error
    // let’s alert the user about what happened
    alert(`Something went wrong! ${error.message}`)
  }
}
getUsers('https://api.superhi.com/users')

try/catch is a bit like and if/else statement:

if (everythingSucceeds) {
  // the try part
  alert('success!')
} else {
  // here’s the catch
  alert('oh no!')
}

Asynchronous code is a really powerful feature of Javascript and we’ll be exploring it later on in the project, so don’t worry about understanding it 100% just yet!

Getting data with fetch

When we want to get or send data we can use fetch. Using fetch lets us get and send data dynamically behind the scenes using Ajax. This means we can do things without our page reloading.

Firstly we actually fetch the data:

fetch('https://api.superhi.com/users')

When fetch runs it gives us back the data, which we can then convert into different formats. It could be regular text, json or even some file data.

We’ll be converting our fetch response into json:

// we can also write async functions like this… pretty funky!
() async => {
  // we await our fetch to give us a response
  const response = await fetch('https://api.superhi.com/users')
  // then we convert that response into json data
  const data = await response.json()
  // then do something with the data
  return doSomething(data)
}

Using Javascript modules

Traditionally when building our websites, we include our script files on the page and then can start writing our code.

<script src="jquery.js"></script>
<script src="jquery-plugin.js"></script>
<script>
  $(document).on('scroll', function() {
    // some code here
  })
</script>

With our React app, things work a bit differently. Our files have no idea about other files unless we import them in. Our code starts at index.js and we import and export things from our files to connect the code together.

Our index.js file would look like this:

// this will grab react from our packages
// we can now use it as the `React` variable name
import React from 'react'
// grab our Header component from the Header.js file
import Header from './Header'

const App = () => (
  <div>
    <Header title="Bangarang!" />
  </div>
)

export default App

And our Header.js file like this:

// whenever using components, we always need React
import React from 'react'

// create our component as the variable name Header
const Header = ({title}) => <h1>{title}</h1>

// we have to export our component otherwise we can’t access it from the outside
export default Header

It’s easier to think of our app as just following the trail starting from index.js. Files can only know about other files if they import something. We can only access things that are exported.

This is the idea of modules and we’ll get more a feel for it by putting some of our components into separate module files later on in the project.

Importing other stuff

Something else useful we can do is to import our css and images directly into our Javascript too. create-react-app will do all the hard work with figuring out what type of file it is and just making things work for us. This lets us focus more on what we’re building.

One thing we always need to make sure of is that our imports go at the top of the file:

import logo from './logo.svg'
import './App.css'

For now, we can delete both App.css and logo.svg and then remove the references to them in the App.js file:

import React, {Component} from 'react'

class App extends Component {
  render() {
    return <div className="page">Welcome to Jiffy!</div>
  }
}

export default App

Three main components

The way we’re going to structure our app is by breaking it down into 3 main components:

  1. Header — has the title and clear results button
  2. Search — the main search box and gif images stack
  3. UserHint — gives the user some instructions
Header
Search
UserHint

jiffy structure

Header component

To start off with we’re going to create a very simple header component with our title in. Later on, we’ll make this a bit more complex to switch it to our clear search button when we have gifs loaded on our page.

const Header = () => (
  <div className="header grid">
    <h1 className="title">Jiffy</h1>
  </div>
)

Search input component

Our Search component in the middle of the page is going to be made up of an input element and then also a stack of all our gif images that will display on top of it when we search for something.

const Search = () => (
  <div className="search grid">
    <input className="input grid-item" placeholder="Type something" />
    // our gifs will go in here later
  </div>
)

With our input elements we can listen out for some events whenever a user interacts with the input. In our case we want to listen for both the onChange and onKeyPress events.

const Search = () => (
  <div className="search grid">
    <input
      className="input grid-item"
      placeholder="Type something"
      onChange={handleChange}
      onKeyPress={handleKeyPress}
    />
    // our gifs will go in here later
  </div>
)
  • onChange — gives us info about the value in the input whenever it changes
  • onKeyPress — gives us event info about the key that was pressed

We could write our handleChange function like this:

const handleChange = event => {
  // same as…
  // const value = event.target.value
  const {value} = event.target
  // event.key and event.keyCode are empty with onChange
}

We could write handleKeyPress like this:

const handleKeyPress = event => {
  const {value} = event.target
  // value gives us the previous updated value
  // which is why we need to use onChange
  if (event.key === 'Enter') {
    alert('you pressed enter!')
  }
}

Putting these together inside of our class style component would look like this:

class App extends Component {
  handleKeyPress = event => {
    // do something with the event
  }
  handleChange = event => {
    // do something with the event
  }
  render() {
    return (
      <div className="page">
        <Header />
        <div className="search grid">
          <input
            className="input grid-item"
            placeholder="Type something"
            onChange={this.handleChange}
            onKeyPress={this.handleKeyPress}
          />
          // our gifs will go in here later
        </div>
      </div>
    )
  }
}

User hint component

Our UserHint component at the bottom of the page is to give the user some hints and instructions as to what to do:

  1. When the search input has more than 2 characters, tell user they can hit enter to search
  2. When there are results, tell the user they can hit enter to search more
  3. If there are some gifs currently loading, show a loading spinner

We’ll pass both or loading state and hintText in as props, which will be controlled as state in our parent component.

const UserHint = ({loading, hintText}) => (
  <div className="user-hint">
    {loading ? <img src={require('./images/loader.svg')} className="block mx-auto" /> : hintText}
  </div>
)

Thinking about our state

Thinking about our app in terms of what state it needs, we can break it down like this:

{
  gifs: [],
  searchTerm: '',
  hintText: '',
  loading: false,
}

Our gifs

We can store these as data inside of an array. When we search the Giphy API, we’ll get back a list of results (which we’ll look at later), from which we’ll take a random result and add it to the stack.

Our searchTerm

Every time we press a key on the input we’ll use onChange to store the searchTerm inside of our state. This is what’s called a controlled input in React.

Our user hintText

  • Our user hint text will tell the user what they’re currently searching for and tell them to hit enter to search for it.
  • It will only display when there are 3 or more characters in the search input.
  • If there are already results, it will tell the user to hit enter to see more results

The loading state

This will be a true or false boolean value that will trigger the loading spinner on the page. When the AJAX search starts, it will be true, when it stops again it will be its default false.

Using these four bits of state we can make our entire UI work. We’ll feed the state into our components as props and let those components decide what to display based on it.

Controlling our input

With our search input we’re going to have the following code:

class Search extends Component {
  render() {
    return (
      <input
        onKeyPress={this.handleKeyPress}
        onChange={this.handleChange}
        className="input grid-item"
        placeholder="Type something"
        value={this.state.searchTerm}
      />
    )
  }
}

See those handleKeyPress and handleChange functions? We’re going to call to each of those every time the input either has an onKeyPress or onChange event fired on it. We can add those in like this:

class Search extends Component {
  constructor(props) {
    super(props)
    // our default state as we talked about in the previous section
    this.state = {
      gifs: [],
      searchTerm: '',
      hintText: '',
      loading: false,
    }
  }
  // we can also use arrow functions in a class
  // it means we don’t have to do our .bind(this)
  handleKeyPress = event => {
    // same as const value = event.target.value
    const {value} = event.target
    // if we press enter and there’s more than 2 characters
    if (event.key === 'Enter' && value.length > 2) {
      // stop the default action
      event.preventDefault()
      // run the search using the input text
      this.searchGiphy(value)
    }
  }
  handleChange = event => {
    const {value} = event.target
    // run set state with the previous state and props
    this.setState((prevState, props) => ({
      // spread out all the previous state
      ...prevState,
      // here we overwrite the searchTerm with whatever’s in the input
      searchTerm: value,
      // if the input value is longer than 2 characters, set the hintText
      // otherwise just set it to be empty
      hintText: value.length > 2 ? `Hit enter to see ${value}` : '',
    }))
  }
  render() {
    return (
      <input
        onKeyPress={this.handleKeyPress}
        onChange={this.handleChange}
        className="input grid-item"
        placeholder="Type something"
        // set the value from our state every time it’s updated
        value={this.state.searchTerm}
      />
    )
  }
}

The idea of what we’re doing here is:

  • onKeyPress — check whether the user has pressed enter and run the search
  • onChange — update the searchTerm and hintText every time the input changes

What is an API?

It’s like a harbor. It’s designed to move shipping containers of certain shapes and sizes in and out. It might be open to the public, or it might be for VIP use only.

— Taken from Sideways Dictionary

APIs in the wild

SuperHi uses lots of APIs to do all kinds of stuff. For example here’s what happens when a new student buys a course:

  1. We call Stripe’s API to make a ‘payment token’ from the user’s card
  2. We then use our own backend API to finalise payment and create the user in the database
  3. Then we use Intercom’s API to add that user to the weekly course email list
  4. Using the user’s email address, we create an auto-invite to Slack using their API
  5. For a successful payment email, we use SendGrid’s API to send them email

We also do things like use Wistia’s API to fetch all of our course videos and show them on our own site.

Getting data from Giphy

We’re going to use Giphy’s API to find us gif images that match a certain keyword. It requires us to make a HTTP GET request to their server using a token code for access.

Our search URL to Giphy is going to look like this:

https://api.giphy.com/v1/gifs/search?api_key=api_key&q=doggos&limit=25&offset=0&rating=PG&lang=en

It’s broken down into lots of parts:

https://api.giphy.com/v1/gifs/search ? api_key=api_key &q=doggos &limit=25 &offset=0 &rating=PG &lang=en

The ? after the main part of the URL tells it we want to make a query. This is called a query string.

Each part after that then has a &query=term to add data to our query. These look a bit like HTML attributes or CSS styles with the property name on the left and the value on the right.

We join these all together using an & each time.

JSON and Giphy’s API explorer

Using the Giphy API Explorer we can run some test requests to the Giphy API and explore what the data looks like.

Typically when we make requests to send and receive data on the web they use a data format called JSON (Javascript object notation). It’s exactly the same as the Javascript objects we’re used to using:

{
  "name": "Lawrence",
  "age": 26,
  "location": "Melbourne"
}

The only difference here? All keys (property names) and text values are wrapped inside of double quotes. This makes it safer to send and receive the data over the web.
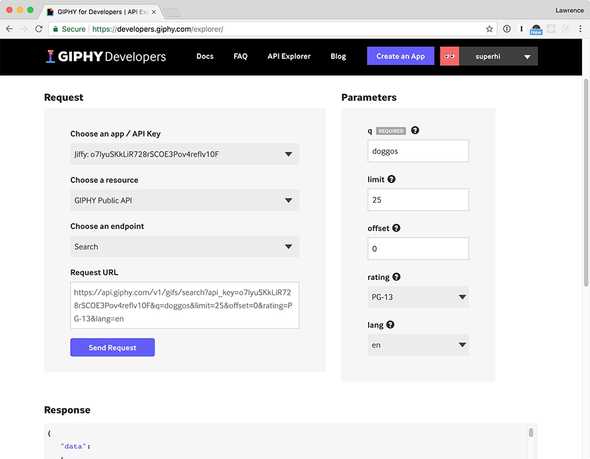
giphy api explorer

Say we do a search to give us back some doggo gifs, we’ll get this back. Our response data from Giphy is made up of three key bits:

{
  // the array of actual images as data
  "data": [],
  // details on how many results there are in total
  "pagination": {},
  // details about the request (whether it was successful)
  "meta": {}
}

To expand on that a bit, the data we get back looks like:

{
  "data": [
    {
      "type": "gif",
      "id": "l2Sq0aDdjWbqgGsGQ",
      "slug": "dogs-lookhuman-doggos-l2Sq0aDdjWbqgGsGQ",
      "url": "https://giphy.com/gifs/dogs-lookhuman-doggos-l2Sq0aDdjWbqgGsGQ",
      // a bunch more gid data (trimmed down for size)
      "images": {
        "fixed_height_still": {
          "url": "https://media0.giphy.com/media/l2Sq0aDdjWbqgGsGQ/200_s.gif",
          "width": "200",
          "height": "200"
        }
        // and loads more image formats and sizes
      },
      "title": "dogs GIF by Look Human"
    },
    {
      "type": "gif",
      "id": "ConNgpWs8uriE",
      "slug": "zebra-poodle-doggos-ConNgpWs8uriE",
      "url": "https://giphy.com/gifs/zebra-poodle-doggos-ConNgpWs8uriE",
      // a bunch more gif data (trimmed down for size)
      "images": {
        "fixed_height_still": {
          "url": "https://media3.giphy.com/media/ConNgpWs8uriE/200_s.gif",
          "width": "161",
          "height": "200",
          "size": "20117"
        }
        // and loads more image formats and sizes
      },
      "title": "zebra poodle GIF"
    }
  ],
  // here we get some info on our request and how many results there are
  "pagination": {
    "total_count": 391,
    "count": 2,
    "offset": 0
  },
  // and some metadata about the request itself
  "meta": {
    "status": 200,
    "msg": "OK",
    "response_id": "5a1fbcf64e456c6132d4bfa6"
  }
}

With the requests we make, we are going to be interested in the data part of the response.

What is fetch?

Using fetch lets us get and send data dynamically behind the scenes using Ajax. This means we can do things without our page reloading.

We’re going to take our URL that Giphy gave us and put it into a fetch request to get data from the Giphy API behind the scenes.

fetch(
  'https://api.giphy.com/v1/gifs/search?api_key=api_key&q=doggos&limit=50&offset=0&rating=PG-13&lang=en'
)

fetch works asynchronously (or async for short). This means our code can run in the background whilst other stuff is still going on.

Promises with fetch

When we deal with asynchronous code, we have callbacks. Callbacks are functions that run once our background task has been completed.

In modern Javascript asynchronous code is run inside something called a Promise. Promises package up functions and run them in the background — eventually either succeeding or failing.

// we run fetch to get our projects
fetch('https://api.superhi.com/projects')
  // when it succeeds we run .then() on it
  // this is a callback where we get the response
  .then(response => {
    // here we convert the response to json
    // we then return it to send it along to the next step
    return response.json()
  })
  // we run .then() again and get access to the data
  .then(data => {
    // then we can do something with the data
  })
  // if there’s an error, we can catch it out at the end
  .catch(error => {
    // alert the user what went wrong
    alert(error.message)
  })

This style of using fetch is called a Promise chain (because the .then() bits are like a chain of data getting sent along).

Don’t worry too much about remembering this, as we’ll be writing our asynchronous code a bit differently to this to make things more clear and easier to remember.

Using async/await

Another clearer way to write our fetch code is with an async function. These look like regular functions, but we instead use an await keyword whenever there is background stuff we need to wait on.

Taking our example from before, our code would look like this:

// we declare the function with the async keyword
async function getData() {
  // we can now use await whenever there’s background bits to wait on
  // here we await our fetch response to come back
  const response = await fetch('https://api.superhi.com/projects')
  // and then again we await our response to be turned into json
  const data = await response.json()
  // now we can do something with our data
  return doSomething(data)
}

See how our code is now a lot neater and easier to read? This is what makes async functions great, they make sometimes complex code more logical as we just follow the steps from top to bottom.

Now, what happens when something goes wrong? How do we handle that?

We can use something called try/catch inside of our function. Firstly it will try to fetch the data, and if it fails it will jump down to the catch section to handle the error and tell the user something’s gone wrong.

async function getData() {
  // it starts by trying to run whatever code we tell it
  try {
    const response = await fetch('https://api.superhi.com/projects')
    const data = await response.json()
    return doSomething(data)
    // if something goes wrong, it jumps down to the catch part
  } catch (error) {
    // we can then deal with the error separately
    alert(error.message)
  }
}

try/catch is a bit like and if/else statement:

if (everythingSucceeds) {
  // the try part
  alert('success!')
} else {
  // here’s the catch
  alert('oh no!')
}

Fetching gifs in our component

Tying together what we’ve just seen with async functions, we can build this into our own component:

class App extends Component {
  // we instead write our async function as an arrow function
  searchGiphy = async term => {
    try {
      // use fetch with our search term embedded into the `q=term` part of the url
      const response = await fetch(
        `https://api.giphy.com/v1/gifs/search?api_key=o7IyuSKkLiR728rSCOE3Pov4refIv10F&q=${
          term
        }&limit=50&offset=0&rating=PG-13&lang=en`
      )
      // this grabs the results data from our json code
      const {data} = await response.json()
      // if we have no results in the array, we throw an error
      // the error will be sent down to the catch part
      if (!data.length) {
        throw `Nothing found for ${term}`
      }
      // now do something with our data
      return doSomething(data)
    } catch (error) {
      // alert the user something went wrong
      // we’ll change this later on
      alert(error)
    }
  }
  handleKeyPress = event => {
    const {value} = event.target
    if (event.key === 'Enter' && value.length > 2) {
      event.preventDefault()
      // use our searchGiphy function above
      this.searchGiphy(value)
    }
  }
}

What does that throw bit do?

What we’re doing there is checking if our results array is empty. We can check to see if an array is empty by saying:

if (!data.length) {
  throw 'Nothing found'
}

When we’re running our code inside of a try/catch and we use the throw keyword, it means we have an error and sends the code down to the catch part.

A dynamic Giphy URL

Just to look at our Giphy URL, the part we want to change is the q=searchTerm bit.

If we break apart our URL, we can insert our search term in there as a variable and then join all the pieces together using a template string:

// the term variable will insert into our
// giphy search as a dynamic segment
const fetchData = term =>
  fetch(
    `https://api.giphy.com/v1/gifs/search?api_key=o7IyuSKkLiR728rSCOE3Pov4refIv10F&q=${
      term
    }&limit=50&offset=0&rating=PG-13&lang=en`
  )
// then use the function like this
fetchData('rik as sour patch kid')

Our loading state

Inside of our state lets add in a property for our loading, we’ll make it false by default:

class App extends Component {
  constructor(props) {
    super(props)
    this.state = {
      searchTerm: '',
      hintText: '',
      loading: false,
    }
  }
}

The idea is that when we start a search, we’ll set it to true, and when the search finishes we’ll set it back to false again.

this.setState((prevState, props) => ({
  // take all the previous state
  ...prevState,
  // overwrite the loading state to be true
  loading: true,
}))

If we look at our UserHint component, see the loading prop? This will render out our loading spinner image based on whether loading is true or false. This is controlled from our state and then passed down into our Header component.

const UserHint = ({loading, hintText}) => (
  <div className="user-hint">
    {loading ? <img src={require('./images/loader.svg')} className="block mx-auto" /> : hintText}
  </div>
)

Using our Giphy data

Inside of our Giphy response, we have a section of it called data, and it contains an array of all our images. Here’s a shortened version of what it looks like:

// our array of images looks like this
return [
  {
    type: 'gif',
    id: '3oFyD4xKncK6ptR7qg',
    slug: 'justin-g-nyc-new-york-time-lapse-3oFyD4xKncK6ptR7qg',
    url: 'https://giphy.com/gifs/justin-g-nyc-new-york-time-lapse-3oFyD4xKncK6ptR7qg',
    // loads more fields in here
    images: {},
  },
  {
    type: 'gif',
    id: '3gEFiAYiHJJCg',
    slug: 'new-york-city-love-photography-3gEFiAYiHJJCg',
    url: 'https://giphy.com/gifs/new-york-city-love-photography-3gEFiAYiHJJCg',
    // loads more fields in here
    images: {},
  },
]

Inside the images part is the bit we want to use to create a gif on our page. There’s loads of different formats and types in there, here’s a shortented version.

return {
  fixed_height_still: {
    url: 'https://media3.giphy.com/media/3gEFiAYiHJJCg/200_s.gif',
    width: '300',
    height: '200',
  },
  preview_webp: {
    url: 'https://media3.giphy.com/media/3gEFiAYiHJJCg/giphy-preview.webp',
    width: '222',
    height: '148',
    size: '47712',
  },
  original: {
    url: 'https://media3.giphy.com/media/3gEFiAYiHJJCg/giphy.gif',
    width: '500',
    height: '333',
    size: '309710',
    frames: '5',
    mp4: 'https://media3.giphy.com/media/3gEFiAYiHJJCg/giphy.mp4',
    mp4_size: '78465',
    webp: 'https://media3.giphy.com/media/3gEFiAYiHJJCg/giphy.webp',
    webp_size: '226746',
  },
}

The image format we want is the original, and then the mp4 file of it (we’ll actually be creating videos rather than actual gif images as they have better performance and smaller file size).

Getting our first result

The eventual idea is that we’re going to take a random result from our array and then add it to our stack of gifs. But to start off with let’s just grab the first result, get its mp4 file and then create a Gif component with it.

const gif = data[0]

What’s happening here? We look inside the data array and get the first element.

Creating a Gif component

With that we can now create a Gif component which gives us back a video element:

// we can use it in our App like this:
const gif = data[0]
<Gif {...gif} />

And then our Gif component itself, we’ll make it a class as it’s going to have some state later on:

class Gif extends Component {
  render() {
    const {images} = this.props
    return <video className="grid-item video" autoPlay src={images.original.mp4} loop />
  }
}

So what’s going on here?

  • Inside our Gif, we grab the images
  • From the images, we get the original
  • Finally, we grab the mp4 src for it

The src should look something like this:

'https://media1.giphy.com/media/Z3aQVJ78mmLyo/giphy.mp4'

On our video element we’re also adding:

  • autoPlay — so our video plays automatically
  • loop so it loops over and over

When we put props onto an element with no value (like we’re doing here), it automatically assumes they are true values.

Creating a random result

Given that we have an array of 50 images being returned to us from Giphy, we want to get a random one each time.

A quick Google search of get random result from array javascript returns this top result. If we scroll down the page we can find a nice modern Javascript version of how to do it:

const randomChoice = arr => {
  const randIndex = Math.floor(Math.random() * arr.length)
  return arr[randIndex]
}

So say we have an array:

const people = ['lawrence', 'rik', 'milan', 'krista', 'ryan', 'adam']

We can then use it like this:

randomChoice(people)
// krista
randomChoice(people)
// rik

To tie that in with our own Giphy data, we can just pass it our array of image and it’ll give us a random one back:

randomChoice(data)

Adding the gifs to our state

Let’s store our gifs inside our state, we’ll do it so that they’re an array:

this.state = {
  gifs: [],
  searchTerm: '',
  hintText: '',
  loading: false,
}

Every time we do a search? We’ll get our previous gifs, and add a new random one to the list. We can do that using the spread operator to first spread all the gifs into our array, and then put our new one on the end:

this.setState((prevState, props) => ({
  // add the previous state in
  ...prevState,
  // spread out our previous gifs
  // add a random new one on the end
  gifs: [...prevState.gifs, randomChoice(data)],
  // change our hint text because we now have results
  hintText: `Hit enter to see more ${term}`,
}))

Our gifs are now an array, so we need to loop over them inside of our App component:

{
  gifs.map((gif, i) => <Gif key={i} {...gif} />)
}

See that key bit? This is to give each element in our sequence and id number so that React can work a bit faster in figuring out what’s what with adding and removing components from our page.

If you can’t see them yet, you’ll want to comment out this bit in your CSS:

.video {
  /* opacity: 0 */
  /* transform: scale(0) rotate(0deg); */
}

We’ll be toggling the opacity of our videos in the next section.

Using video events

With our gif videos, we want to make sure they are loaded properly before adding them to the page. Otherwise, things are a bit jumpy.

We’ll do this by initially hiding the video using opacity, and when the video is loaded, then adding an extra class of loaded to it to trigger the opacity back in.

What we’ll be doing is listening out for the onLoadedData event on our video, and then toggling a loaded state to be true. This will be individual for each Gif as they’ll be wrapped up in their own components.

class Gif extends Component {
  constructor(props) {
    super(props)
    this.state = {
      loaded: false,
    }
  }
  render() {
    const {images} = this.props
    const {loaded} = this.state
    return (
      <video
        className={`grid-item video ${loaded && 'loaded'}`}
        autoPlay
        src={images.original.mp4}
        loop
        onLoadedData={() => this.setState({loaded: true})}
      />
    )
  }
}

When a video has a loaded state of true, we’ll then add an additional loaded class to the element, triggering the opacity and some transitions on it.

Handling errors

With our code, we want to handle things when they go wrong. Most commonly when a user searches for something that doesn’t exist. If they do that, it’ll return us back an empty array of results, so let’s check for that in our code:

const data = []
if (!data.length) {
  throw `Nothing found for ${term}`
}

When we use the throw keyword it will tell our code to stop where it is and go down to the catch part of our function:

try {
  const term = 'jurassic park!'
  const data = []
  if (!data.length) {
    throw `Nothing found for ${term}`
  } catch (error) {
    alert(error)
    // Nothing found for jurassic park!
  }
}

Our searchGiphy function

Throwing that all together, our searchGiphy is going to look this:

// an async function that we pass a search term
searchGiphy = async term => {
  // set the loading state, we’re starting the search next up
  this.setState({
    loading: true,
  })
  // our try block of stuff we’d like to run
  try {
    // wait for a response from the giphy api
    // with our search term in the url ${term}
    const response = await fetch(
      `https://api.giphy.com/v1/gifs/search?api_key=o7IyuSKkLiR728rSCOE3Pov4refIv10F&q=${
        term
      }&limit=50&offset=0&rating=PG-13&lang=en`
    )
    // convert that response to json and grab the .data part of it
    const {data} = await response.json()
    this.setState((prevState, props) => ({
      // set our previous state
      ...prevState,
      // toggle our loading off
      loading: false,
    }))
    // check if there’s results in the data
    if (!data.length) {
      // if not, we throw an error to say nothing found
      throw `Nothing found for ${term}`
    }
    this.setState((prevState, props) => ({
      ...prevState,
      // take our gifs array and add our new one to it
      gifs: [...prevState.gifs, randomChoice(data)],
      // update the hint text now we have results
      hintText: `Hit enter to see more ${term}`,
    }))
    // catch the erorr down here, with the error variable as our message
  } catch (error) {
    this.setState((prevState, props) => ({
      ...prevState,
      loading: false,
      hintText: error,
    }))
  }
}

This is quite a big function but it handles a lot of stuff for us in a logical order that we can understand. Every step of the way we’re keeping track of our state and updating it with the data and what’s happening.

Clearing our gifs

We can write a method to clear our search, it will take our state and start it fresh again:

clearSearch = () => {
  this.setState((prevState, props) => ({
    searchTerm: '',
    gifs: [],
    hintText: '',
  }))
  this.input.focus()
}

See the last line?

this.input.focus()

Here we are grabbing our input and then focusing the cursor back on it again. Currently this.input doesn’t exist, and we can link that up using refs:

return <input ref={input => (this.input = input)} />

A ref is a way for us to be able to grab specific elements inside of components in React. A bit like the React-way of using:

document.querySelector('.input')
// or
$('.input')

A bit more about refs on the React docs.

Running the clearSearch method

Something we can do in React is to pass functions around as props. We can do that with our Header component, passing our clearSearch method to it. We can write it like this:

return <Header hasGifs={hasGifs} clearSearch={this.clearSearch} />

And then inside of our Header we can pick up that function and then run it onClick. Let’s make our Header component to look like this:

const Header = ({hasGifs, clearSearch}) => (
  <div className="header grid">
    {hasGifs ? (
      <button onClick={clearSearch} type="button" className=" grid-item">
        <img src={require('./images/close-icon.svg')} className="block mx-auto close-button" />
      </button>
    ) : (
      <h1 className="title">Jiffy</h1>
    )}
  </div>
)

So now when we click on our button inside the header, it’s going to execute the function that has been passed down to it.

See that hasGifs prop? We’ll take a look at that next up!

Checking if we have gifs

Something we can do in React is to pass functions around as props. We can do that with our Header component, passing our clearSearch method to it. We can write it like this:

// check if there are any gifs in our array
const hasGifs = this.state.gifs.length

// pass this variable to our `Header` component
<Header hasGifs={hasGifs} clearSearch={this.clearSearch} />

const Header = ({hasGifs, clearSearch}) => (
  <div className="header grid">
    {/* if we have gifs, render the close button */}
    {hasGifs ? (
      <button onClick={clearSearch} type="button" className=" grid-item">
        <img src={require('./images/close-icon.svg')} className="block mx-auto close-button" />
      </button>
    {/* otherwise just render out our regular title */}
    ) : (
      <h1 className="title">Jiffy</h1>
    )}
  </div>
)

What is git?

Git is a system that lets you work on code in a more manageable way. It does this by letting you create branches from your code, which are a bit like snapshots that you can work on and then merge back into the main branch.

Whilst you work on a branch, you make commits, which are a bit like recorded updates. Due to the fact all of our code is written in text files, git can keep track of exactly what changed, when and where.

This makes things easier when working in teams with lots of code, as it means you’re not overwriting other people’s work easily.

What is GitHub?

GitHub is a website that uses git to make collaborating on code easier and more accessible. It’s home to thousands of open source code projects, such as React, Ruby on Rails and Ember.js. Git code is stored in what we call repositories.

We’re going to use git and GitHub to publish our code online. Our repository will be the storage location for our code before we then publish our sites live.

Install using homebrew

On a Mac, installing git using homebrew is the best way to go…

brew install git

Install for Windows

Using the Git for Windows installer is the easiest way to set up.

With git installed, via the terminal you can now type:

git version

It should give you back something like git version 2.7.3.

Committing our code

With git installed we can interact with git via our terminal. Firstly let’s navigate to our project.

# assuming my project is on the desktop
cd Destkop/jiffy

Set up a repo

What we want to do first it to set up a new git repository.

git init

Add and commit the files

We’ve now set up an empty git repository, and we need to explicitly add our project files to it:

# adds all our files
git add .
# commits our files with a message
git commit -m 'initial commit'

Create a GitHub repo

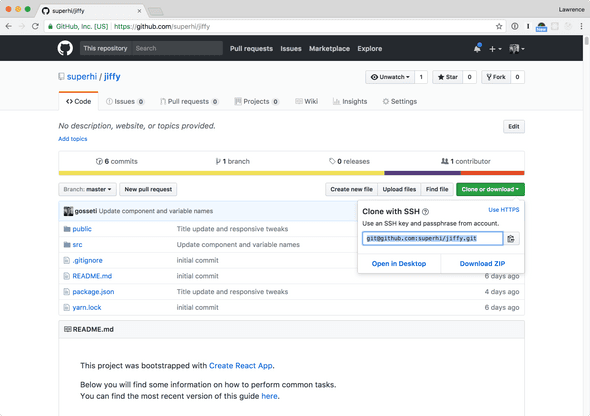
Now we’ve committed our files we need to head over to GitHub and set up a repository to push these files to:

github

From your repo page you should find an address that looks a bit like this:

[email protected]:superhi/jiffy

Using that, we can now add our GitHub repo as a location we can push our code to. Let’s run this from the terminal:

git remote add origin [email protected]:superhi/jiffy

This adds our GitHub repo as a location that we can push our code to, under the name origin. We can now push to it by running:

git push origin master

This pushes the master branch of our code to the origin location (which is our GitHub repo). It should prompt you for your username and password to authorise you to access GitHub.


If you’re feeling a bit more advanced and want to set up GitHub so you don’t have to type in a username and password every time, you can add an SSH key to it using this guide. You’ll want to follow these generating an SSH key and adding the SSH key sections.

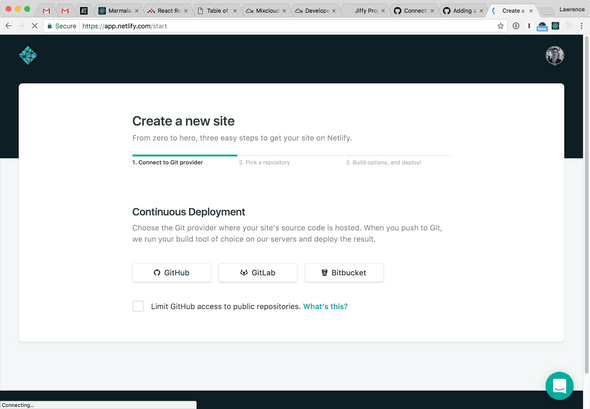
Using Netlify for hosting

Netlify is a service designed for the sole purpose of hosting static websites and front-end applications. It’s a free service by default and has all the best practices for performance baked in, making our React sites as fast as possible when they’re online.

It’s also got a fantastic and well designed UI that makes life a lot easier for us!

How Netlify works

  • We create a site on Netlify
  • We connect it to a GitHub repo
  • Netlify takes the code and builds the site
  • Every time we push updates, it automatically rebuilds

This is a speedy and modern way to build websites without worrying about manually deploying them or having to update files via FTP.

netlify

With the site connected via GitHub, the options it needs to be set with are:

  • Build command: npm run build
  • Publish directory: build
  • Production branch: master

Inside of our public folder, you’ll also want to create a file called _redirects with the following code:

/*  /index.html  200